
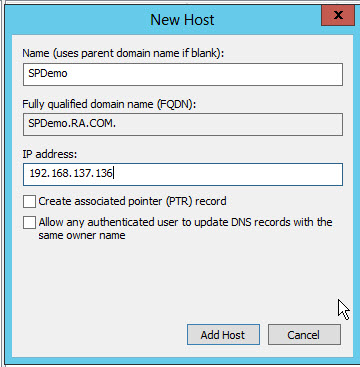
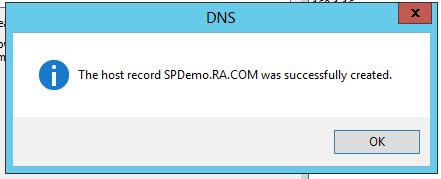
- Log in to the Server and Open DNS
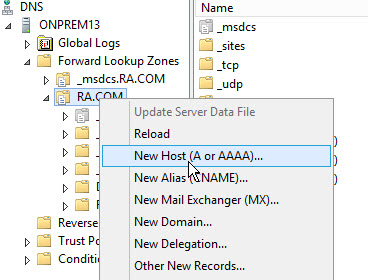
- THost Header and IP Address, Click on Add Host
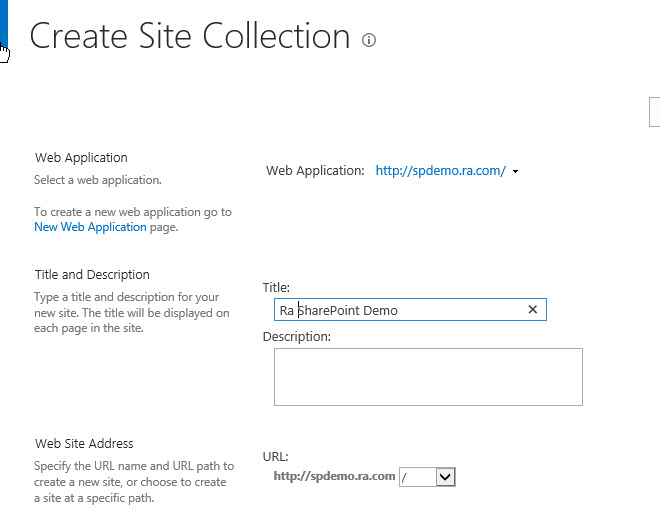
Create New Web Application
Go to Central Administration and Create your new web application
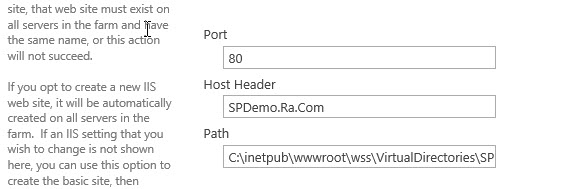
Create Web Application and Provide the Host header you just created with Port 80
Once you create the Web Application, Create associated site collection.
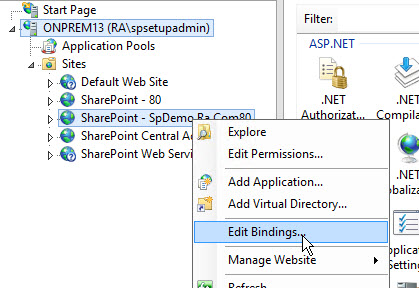
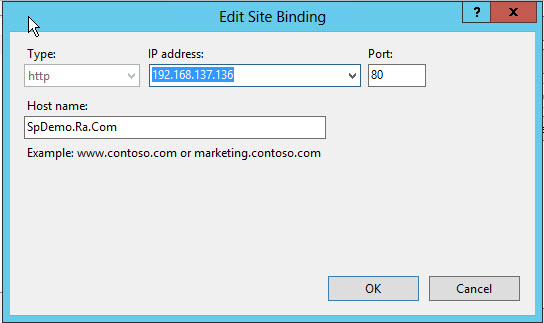
Edit Bindings in IIS Web Site
Open IIS and find newly created Web Site
Right click and go to Edit Bindings
Add Record to the Server Host File
Open Note Pad as Administrator and navigate to following location
C:\Windows\System32\drivers\etc
Add new record as follows

Disable loop back of the Web Server
- Open Registry Editor Navigate to following location
HKEY_LOCAL_MACHINE\SYSTEM\CurrentControlSet\Control\Lsa
Create New Value (DisableLoopBackCheck) Type of DWORD and set value to 1
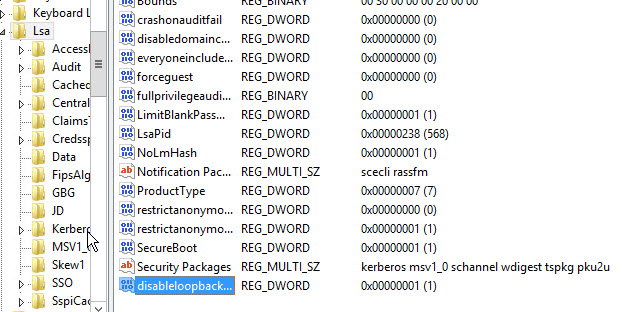
When we are having several host headers configured in to same port on server we have to add Registry entry. On those mentioned servers that particular registry entry is missing.
Open Registry Editor Navigate to
HKEY_LOCAL_MACHINE\SYSTEM\CurrentControlSet\Control\Lsa\MSV1_0
- Create Multi-String Registry Key named BackConnectionHostNames
- Add all three host headers to the Registry Key
- Intranet.ra.com
- Myportal.ra.com
- Survey.ra.com
- Save and close the registry.
- Restart IIS.